Creating an engaging and useful Canvas home page
In 2018, Canvas launched a tool faculty can use to develop more advanced design aspects in course creation–it’s not very pretty, even four years later, but it can be useful if you’re willing to dive in and explore. Here is a home page for an asynchronous online course developed using just a few of these design tools, Teacher & TA Details and Module List:

Some things to notice:
- Contact information inserted in the upper left corner of the home page (added with Design Tools)
- Animated GIF (made by hand with Photoshop)
- Introductory text blurb to the right of that (added in a table that contains these first three elements)
- Module list in columns (added with Design Tools)
- Current (selected) module contents displayed below (added with Design Tools)
This setup gives students a one-stop-shop for the most important elements in this class–a space for general questions and major assignments, along with, in this case, a week-to-week breakdown of class content. Adding date functionality with the Design Tools has proven more challenging than necessary, but adding dates or more description to the module titles would provide a simple workaround. How can you implement this kind of setup? Let’s get started!
Basic Knowledge and a Few Notes
First of all, you’ll want to be able to set a home page in your Canvas site. If you’re not sure about how to do this, here’s a quick how-to!
Second, you’ll need to have your modules made. See this blog post for an overview of how I typically set up modules, and this how-to if you’re at stage one. You can tweak your modules, change titles, add content, move them around, and so on, after you’ve set up this home page with Design Tools, so don’t worry about getting it exactly right now–but it helps to have some material to work with!
If you want your photo to appear when you insert your contact information using Design Tools, add it in your main Canvas settings page. Here’s a how-to. The other information you can add or edit later.
I used a table to organize the content of the first block of content, including the course title GIF (want to make one yourself? Here’s a how-to for creating animated GIFs in Photoshop, but really, it’s just sort of extra. Because I don’t have enough things to do already?).
Got all that? Okay, let’s get to it!
Accessing Design Tools
Head on over to your home page page, and edit it. Once you do that, a little helper button with a rocket on it should flicker in the upper right hand corner of your screen (this might be a little different depending on your institutional setup, FYI). You can also use the shortcut ALT-SHIFT-D to access it by keystroke.

Open that menu up. You’ll see a menu bar of icons at the top of the window that opens. Let’s take a peek at this menu, first, to get the lay of the land.
Note the icons at the top–hover over each to learn what they do. You can learn a lot by googling “Canvas Design Tools,” so I’m not going to go into everything here, but take a look at this menu. Beneath the icons, you can set a view, there’s a useful help option below that, and then there is an option to add a “content block” to your page. Let’s ignore all that for the time being. Below that are some expandable menus–we’re going to be adding advanced elements. Don’t see that option? Don’t worry! Below that, you can access a souped-up HTML editor.
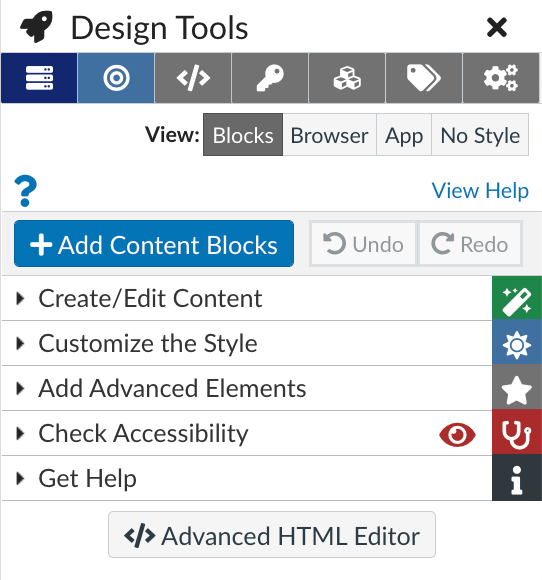
To enable the advanced options you’ll need to add a modules list, you’ll need to tell Canvas that you’re an advanced user–which you are! Click the gear shift button (universal-ish icon for “settings”) in the top right, and select advanced as your comfort level.
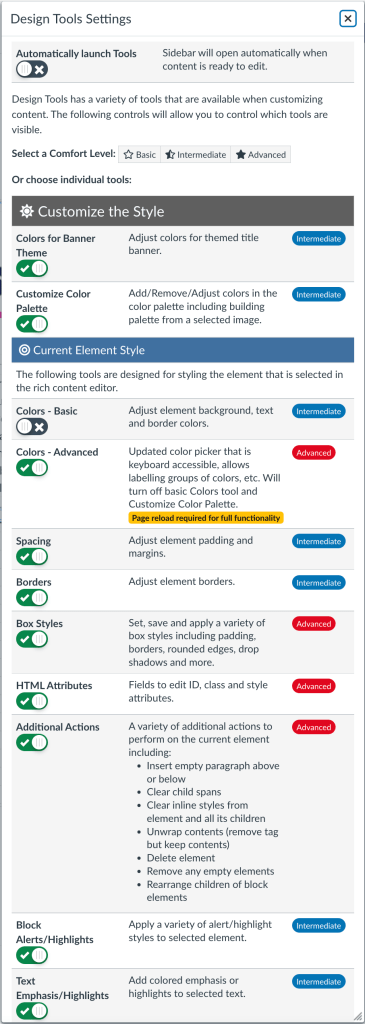
This will enable you to see the advanced Design Tools options. While you’re here, take a look at all the options! Fun, right? Feel free to explore–you won’t break anything. You can always delete this home page and start over.
Close out of that by using the X in the top right corner, and go back to the main Design Tools menu. Now that you can see the “Add Advanced Elements” option, click that. All your advanced options will pop up. We’re going to add Teacher & TA Details and a Modules List.
Let’s start with the Teacher & TA Details.
Adding Your Contact Details
Click Teacher & TA Details menu item. As an aside, note that the little triangle pointer is the universal-ish sign that there’s an expandable menu there if you click it.
My Canvas identity has been set up already, so I’ll see my name right below–with another little triangle pointer. Click your name. Here is where you can enter your details. Note that the image has already been set in the system. Go ahead–add your deets!
Check and uncheck items to display, and then click “Insert as Content Block” or “Insert Details at Cursor.” You can remove them after they’re added by either just selecting them in your page and deleting, or by using this menu to remove them.

It’s as easy as that. I put the details in at the cursor, which I positioned inside the table I created on the home page.
Add a Modules List
Now, select Modules List from the Design Tools menu. Take a look at your options–you’ll probably see something different from the image I’ve included, but it won’t be too different.
As an aside, you must have your Modules page enabled and visible to students in order for this feature to work! The toggle button will hide and display your Modules List, and you can set options for how to display it–number of columns, how to display module content, options for showing dates (I didn’t use this–feel free to experiment!), and so on.

A few things to note here! Click Add all Modules to add your modules. This is also where you update your module names, if you’ve made any tweaks (it’s not automatic, sadly). I’ve set my view to three columns in the Browser Only Features, and ensured that a click goes to the Modules page, rather than the first item in that module. To add the list of items in the module below the module list, you must click All for the Include Quick Links option.
You can select a module to be current or selected when students log on by checking it using the right hand side check mark. If you use dates, this should happen automatically, but I find it simpler just to go in and check the current module. The eyeball option shows or hides that module. You can change the icons of your module list from the default check in a shield (why there are three different check marks here is beyond me–bad design, Canvas!) by selecting the Module List Icon option near the top of this menu.
Save your Canvas page to see the changes reflected.
It took me a while to get the formatting I wanted, so try not to get frustrated. It can get a little fiddly, but once you’ve got it, you’ve got it!

Related Posts: Optimal Canvas Setup